Headstand Pose (Sirsasana)
The Headstand Pose, known as Sirsasana in Sanskrit, is often referred to as the “King of Asanas” due to its numerous benefits and transformative effects on the body and mind. It is an advanced inversion posture in yoga that requires strength, balance, and focus. By reversing the usual effects of gravity, Sirsasana invigorates the circulatory and lymphatic systems, improves blood flow to the brain, and promotes mental clarity.
Practicing the Headstand Pose demands a strong foundation, proper alignment, and gradual progression to ensure safety and prevent injury. It is essential to approach this pose with patience and under the guidance of a qualified instructor, especially for beginners.
What Is Headstand Pose in Yoga?
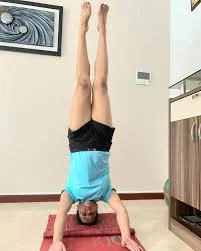
The Shirsasana, one of the most difficult yoga poses, is a headstand. When the phrases are separated, “shir” signifies head, and “asana” implies position. Shirsasana is an inverted or antigravitational yoga pose.
The head of the practitioner must be stable for this intricate yoga pose. After stabilizing the head, the forearms are used to invert and support the remainder of the body. A person needs to be very focused and precise in addition to having strong forearms in order to execute the headstand.
In addition to the physical body swinging downward during a headstand, blood pressure is also incorporated. The blood pressure in the lungs, legs, veins, blood vessels, head, neck, and shoulders has changed. The body must react to this movement to keep the many bodily systems balanced.
The full-body, exhilarating, advanced-level reversed yoga stance known as Shirshasana Headstand Position (Sirsasana), or Salamba Sirsasana, calls for power in the elbows, head, neck, and core. Once you have mastered the Headstand Position, you can practice several difficult variations. The majority of the exercises in this position are Hatha Yoga Sequences, which incorporate breath, body, and mind attention. Since variants of sirsasana can be achieved from this pose, it is regarded as a base position. Sirsasana helps the body produce more energy.
Which muscles are used in Headstand Pose?
- Core muscles
- Deltoids
- trapezius
- rotator cuff muscles
- triceps
- biceps
- erector spinae
- latissimus dorsi
- quadriceps
- hamstrings
- calf muscles
What are the Health Benefits of Headstand Pose?
Stretches, Strengthens, Lengthens:
The headstand pose works the legs, back, upper body, and core while stretching the spine in an inverted position. The friction that the elbows endure when supporting the weight of the body strengthens them. As all of the pressure is applied to the cranium, it becomes stronger. This pose strengthens the biceps and triceps and applies pressure to the arms and shoulders when held for a while. The abdominal muscles are strengthened by the strain on the belly. The brain’s blood arteries can be reinforced by the blood flowing toward it, thereby preventing migraines and other headache-related conditions.
Flexibility and Range of Motion:
An important aspect of this stance is the increased leg flexibility. Flexibility in the hamstring muscles helps prevent sciatica in a roundabout way.
Awareness and Focus:
An inversion yoga pose that is invigorating is a headstand stance. This position compels the practitioner to focus within and become conscious because of the inversion. Given the difficulties of the position, it might be challenging to focus at first, but with consistent practice, awareness can be developed and mental function is enhanced by the increased flow of oxygenated blood to the brain. Deep breathing awareness can have the effect of an inverted pranayama yoga position, and it can also boost one’s sense of spirituality and self-worth.
Chest, Diaphragm, and Breath:
The Headrest Pose raises the chest and rib cage to expand out the back. The pressure in the chest region and the opening of the lung improve its capacity and strengthen the muscles surrounding it. As a result, the respiratory system operates at its best.
Alignment and Posture:
The Headstand Pose improves posture by strengthening the arm, shoulder, and back muscles while also working the core. The straight-line posture of the back allows for alignment correction when the spine lengthens as the legs are raised in the air.
Energising, De-stressing, Relaxing:
The mind becomes cold and serene as oxygenated blood flows to it. Stress hormones are produced when the adrenal glands are compressed. Because of this, stress can be avoided when the adrenal glands are functioning at their best. It also helps prevent anxiety by enhancing mental performance. It is a cooling position because of the slower breathing and the way the stance is done.
Stimulation, Organs, Systems, and Circulation:
By turning onto the head, the Headstand Pose activates the lymphatic system, which is in charge of eliminating toxins from the blood. Because the reverse gravitational pull during the posture flushes out the physiological fluids built in the legs, students who must stand all day due to their jobs or even those who sit still for extended periods might prevent developing edema in their legs. By using the reverse effects of gravity to shift trapped materials, expel undesirable gases, and improve the gastrointestinal organs, Headstand Pose aids in better digestion.
The position indirectly aids in weight loss by enhancing digestion. The brain cools and memory sharpens as a result of the blood rushing down to it. Simultaneously, the eyes receive blood that is rich in nutrients and oxygen, which helps the eyes function at their best and avoid macular degeneration and other eye-related problems.
Others:
Hair follicles absorb the necessary nutrients from the blood as a result, improving the quality and condition of the hair. The facial skin hangs in the opposite way when the stance is held upside down, which causes the flow to be lifted. Additionally, the face glows naturally due to oxygen-rich blood flow. Teenagers in school benefit from the stance since it helps them remember things better. This is because they are often distracted by the modern world. After practicing the pose regularly, one can undoubtedly gain confidence. Consequently, it gets rid of anxiety, tension, and fear.
In addition to psychological benefits including vitality, attentiveness, and relaxation, a study found that mastering deep breathing is linked to increased brain activity. improving the processes of digestion and elimination. stimulating the so-called baroreceptors, which improve the body’s capacity to regulate blood pressure. adjusting blood pressure for the moment to give the heart a break. strengthening the core to improve posture. Improve lymphatic and blood flow throughout the body.
What are the Preparatory poses for Headstand Pose?
The overall activity in the yoga sequence for Sirsasana (Headstand Position) varies depending on the time of the workout because this position is regarded as an Improve Level Position. If one wishes to exercise this early in the morning, they must be aware of their body’s condition in the early hours of the day.
Some people may find it difficult to find a comfortable yoga position before performing Sirsasana because their bodies are particularly rigid and tight. However, the methodical approach to starting the body must be followed if one plans to do it after a yoga practice, which could last for roughly forty-five minutes. A few Sun Obeisance (Surya Namaskar) before this pose is adequate if one practices this exercise in the late evening or early at night because the body typically opens up more quickly even when it is exhausted.
One can begin with Surya Namaskar to warm up and prepare the body for the asana, especially if the asana is performed in the early morning. Balasana, Sarvangasana, and Savasana can be performed as follow-up postures after a modern asana, such as the headstand position. Here is a quick overview of the steps one can take to prepare Sirsasana.
Tadasana Gomukhasana (Standing Cow Face Pose)
The upper abdomen, shoulders, arms, and elbows are all heavily strained in sirsasana. Your arms will get stronger when you start doing Tadasana with Gomukhasana, and they will also promote external rotation and upper arm extensions.
During Headstand practice, the cow face position will help you build a firm upper body basis and a sense of lightness as you raise weight away from your head and neck in Sirsasana.
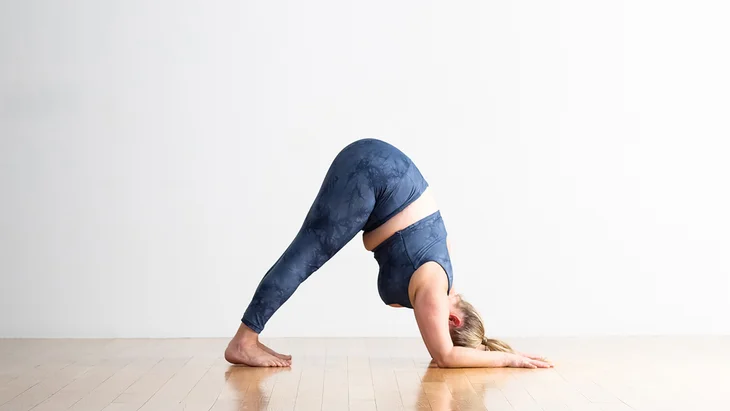
Adho Mukha Svanasana (Downward Facing Dog Pose)
Your Sirsasana practice will benefit from the downward-facing dog pose’s power, stability, and balance. To increase core stability in the inverted pose, the legs are extended here, strengthening the hip and hamstring muscles.
Prasarita Padottanasana (Intense Leg Stretch Pose)
The feet are wide apart in a forward bend when standing. In this tight preparation for Sirsasana, the feet are spread wide apart and the body weight is placed on the head, providing a good stretch for the leg muscles.
How to Perform Headstand Pose?
- Push your forearms to the floor while keeping your elbows behind your shoulders.
- Put your hands around the elbow on the other side. Make any necessary adjustments to keep your elbows shoulder-width apart.
- Let go of your elbows and hands.
- To prevent squishing, tuck your bottom pinky into your handbasket.
- Put your head’s crown down on the ground. Your head should be lowered at the top, neither too much forward nor back. Instead of your hands supporting your skull, the rear of your head will rest on your thumb bases.
- Straighten your legs and lift your hips, much like in Downward-Facing Dog.
- Move your feet slowly toward your head until your hips are as nearly above your shoulders as they can be.
Headstand Pose Video:
What are the Follow-up Poses for Headstand Pose?
Headstand Pose Relaxing Yoga Positions:
One must perform a few positions immediately following Sirsasana to accomplish this.
Balasana (Child Position):
You should also keep your body light and flexible. In addition to supporting the extended spine in Sirsasana, this pose eases tension in the neck muscles. In this position, the hip is regulated.
Sarvangasana (Shoulder Stand Position):
To modify in Balasana (Child Position), perform the back to supine behind. Once your spine is close to the mat or blanket, stretch your arms and legs and hold the pose for a few breaths. Then, raise your body upward, removing your legs, middle back, and lower back from the mat and putting all of your weight on your shoulders and upper back. Lock your neck, bring your chest close to your neck, and raise your body higher by bringing your feet slightly above eye level while using your arms to support you near your hips. The neck and spine, which were strained throughout the Sirsasana exercise, will regain their equilibrium in this position.
Savasana (Corpse Position):
In Savasana, adjust the entire body by breathing slowly and maintaining the trunk, head, and limbs moderately near the mat. Breathe less forcefully and relax your entire body. Take a dozen breaths here.
Headstand Pose Level-Up Follow-up Positions:
There are no heavier yoga poses than Sirsasana, which is known as the King of the Asanas. However, there are variations of this pose that use different leg positions. The following is a list of these variations.
Angle Position) in Headstand:
Once the body is stable, execute Namaste with your feet in the air, beginning with your knees out. Make sure the feet are aligned correctly because if they are not, the head will be under a lot of strain.
Eagle Legs in Headstand:
After you become stronger in Sirsasana, carefully move your foot past the other leg, interlock your thighs with one knee, and then stand up in the Eagle Position. After a few moments, continue in the opposite direction and shift the thighs’ posture.
Twisting Splits in Headstand:
Conduct them backward and forwards with the legs wide open, in contrast to the first variant. Split them anteriorly and posteriorly, but before you do so, make sure you’ve worked out one leg first because the imbalance can cause the body to fall and the neck to become rigid.
Lotus legs in Headstand:
By doing the legs in Lotus Position (Padmasana) and switching them up, one can move deeper into the pose. However, because it is difficult to create in the air, this position must be exercised while seated. Since the legs’ suppleness will make it easier to enter the Lotus posture without using your hands, it is preferable to perform this pose while seated so that you can reach this degree of Sirsasana.
What are the Beginner tips in Headstand Pose?
- The headstand is a contentious position. Although it is referred to as the King of Pose due to its purported advantages, some educators no longer teach it because they believe the risk of the weight on the neck is too high.
- We advise practicing in front of a teacher who can assist you with alignment, as these instructions are simply intended to serve as a guide.
- Whether you decide to practice the entire position or not, strengthening your arms, shoulders, and core is a crucial first step. Be patient since this preparatory work will benefit your entire yoga practice and is, in many respects, more difficult than a headstand.
- All inversions will benefit from core strengthening exercises. A wonderful place to start is by just holding the Plank stance and Downward Dog for one to two minutes. Practice the dolphin pose next, followed by a handstand or forearm balancing to acclimate to being upside down with no weight on the neck.
What is the Breath Awareness in Headstand Pose?
- As you exhale, conduct the top of your head near your palms, and as you exhale, conduct the body near your palms.
- Raise your knee off the mat or blanket with another inspiration, then exhale to extend your spine and lower back upward.
- As you exhale, stiffen your shoulders and legs to prepare your body for the position. Then, walk with your toes close to your chest.
- At this point, make a change, concentrate on the pressure at the top of your head and neck, and breathe while maintaining body awareness.
- As you exhale, raise both of your feet off the mat or floor and place your legs at a 90-degree angle, keeping your back straight and your legs in alignment with your hips, neck, and chest.
- Increase the pressure on the hips as you exhale and expand your body upwards as you inspire. At this point in the pose, begin breathing slowly, maintain your composure, and smile to help the brain receive more fresh blood.
- To regain your position, bring one leg closer to the floor at a time. Then, motivate and guide the entire body to adjust and descend into Child Position to adjust the head, shoulders, and neck.
What are Alignment tips for Headstand Pose?
- In the case of long holding, this is absolute.
- However, as you start to understand the role, bring up the alignment narrated a bit further down in Modifications.
- As your arms share the weight and form a protecting platform, continue to mature your weight on top of your head.
- While keeping your neck stable and stretched, draw your shoulder brands away from your ears and toward your middle.
What are the Types of Headstand Pose?
There are 4 types of sirsasana.
- Salamba Sirsasana I – Supported Headstand.
- Salamba Sirsasana II – Tripod Headstand.
- Salamba Sirsasana III – Supported Headstand.
- Niralamba Sirsasana.
Salamba Sirsasana I – Supported Headstand
What is Salamba Sirsasana I – Supported Headstand?
Salamba Sirsasana (Supported Headstand) is an intense reverse that requires core and upper body strength as well as mental focus and training. Salamba Sirsasana is pronounced, “sah-LOM-bah shear-SHAHS-ah-nah.”
Even though there are numerous physical advantages, such as strengthening your arms, legs, and core, this is a difficult position that you must maintain with a “safety first” mentality. Avoiding placing too much weight on your head and neck is the key to this pose. Let your shoulders and arms support you instead.
The conventional Headstand (Sirsasana) is not the same as this. The opposite conveys strength, beauty, and control. The Sanskrit terms salamba, which means “with support,” Sirsa, which means “head,” and asana, which means “posture/position,” are the origin of the name Salamba Sirsasana I. This position is also known as a “supported headstand” in English.
How Can I Do the Supported Headstand in Salamba Sirsasana I?
Start by using a doubled blanket or an adhesive pad to cushion your head and forearms. Keep your elbows shoulder-width apart and conduct them to the floor. Press your inner wrists assiduously to the floor, roll your upper arms outward slightly, and switch up your fingers. Cup your hands over the back of your head while keeping your arms in place. As though your lower half were in downward dog, move your hips uphill. To keep your torso stretched and secure your neck and head, harden your shoulder blades toward your tailbone rather than your back.
Now, simultaneously exhale and lift both feet off the ground (even if you have to hop somewhat off the ground and angle your knees a little). Harden your tailbone rather than the rear of your pelvis as you straighten your spine. Gain height between the balls of your feet and rotate your thigh bones slightly inward. Instead of using your head and neck to support your weight, firmly force your forearms down. Maintain a balanced weight distribution between your two arms. Now straighten your knees if you thought of a twist.
When performing Salamba Sirsasana for the first time, hold the pose for ten seconds. Maintaining a strong shoulder blade, come down expiring. Hold both feet simultaneously to the ground. Add 5 to 10 seconds to your continue time each time you are in the Supported Headstand if you intend to perform this pose frequently. After you can maintain this position for three minutes, repeat the exercise seven to fifteen times. Before extending a stay to five minutes, begin your steady climb.
Salamba Sirsasana II – Tripod Headstand
What is the Salamba Sirsasana II Tripod Headstand?
Like other Headstands, Salamba Sirsasana II is a “grandeur” yoga pose that radiates power, poise, and beauty. It serves as a springboard for fully expressing Sirsasana.
Although it’s not usually the case, many people consider the Tripod Headstand to be a more contemporary form of Sirsasana. For those who find Sirsasana I incomprehensible, Sirsasana II is just more comfortable. That’s probably because it’s more like the Headstands, where they were put to death as kids.
It is therefore advised that you become proficient with the tripod before moving on to the complete headstand. You won’t have any reason not to try it out and learn the full version if you set it up correctly and make the necessary tweaks. In any case, make sure that when you raise into the complete asana, you increase your strength and control.
How Do You Perform Salamba Sirsasana II – Tripod Headstand?
- Kneel close to a four-fold blanket that has been placed on the ground.
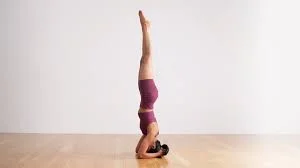
- Your left palm should only cover your left knee. Your fingers should be pointing directly at your head, and your palms should be close to one another. You should keep your palms on the ground no more than shoulder-width apart. Lift your legs above your head and position your top in the middle of the blanket.
- After your head position is in alignment, lift your knees off the ground and straighten your legs. Depress your ankles to the floor while maintaining a straight spine and keeping your toes close to your head.
- Maintain this posture for a few seconds while pressing your chest forward and stretching the dorsal region of your spine. Breathe three or four times.
- Swing slightly off the ground and raise your legs while bending your knees as you expire. At the same time, both feet should be raised off the ground. Once this position is stable, raise your legs, exhale, tighten your knees, maintain an upward toe stance, and maintain your balance.
- Only the top of the head and both hands are on the ground while in the balanced position. Your forearms should be collateral to one another and square to the ground from wrist to elbow. Your upper arms, from elbows to shoulders, should be collateral to the floor and to one another.
- Follow the easy-to-follow directions and cues in Headstand if you can balance.
- To master more advanced postures like Bakasana (Crane Position), Urdhva Kukkutasana (Upward Rooster Posture), Galavasana (Flying Pigeon Position), and Koundinyasana (Position Dedicated to the Sage Koundinya), one must be able to perform this variation of Sirsasana.
Salamba Sirsasana III – Supported Headstand
What is Salamba Sirsasana III – Supported Headstand?
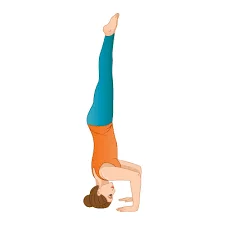
The headstand posture, also known as Sirsasana (Headstand posture) iii, is a version of the base/master yoga position that requires shoulder strength and stability at the top of the head. Sirsasana (Headstand Position) iii employs the palms on the ground for support, whereas the base position or master position balances the body on top of the head while supporting the head with cupped hands. Sri Krishnamacharya developed the sequence and variants of Sirsasana (Headstand Position) via Ashtanga Yoga.
How Do I Perform the Supported Headstand in Salamba Sirsasana III?
A yoga instructor’s guidance is necessary because Sirsasana (Headstand Position) iii is a promoted-level yoga position. Please make sure you fully understand each step before moving on to the next by following the detailed instructions provided under constructing. Only people with experience in the field of yoga in general should utilize this knowledge; individuals who are new to yoga should not.
Method 1:
- Detailed Guide to Headstand Position (Sirsasana) iii
- Take roughly eight calm, deep breaths while sitting in Adho Mukha Virasana (Downward Facing Hero Position) in the middle of the mat.
- To improve the head’s flexibility and to open the shoulders and neck muscles, reveal and assume the Rabbit Position. Remain here for roughly six breaths.
- In Catur Svanasana (Dolphin Position), let go and rest. Take four or so deep breaths to relax.
- Place the top of your head on the floor in Catur Svanasana (Dolphin Position), then slowly rise onto your toes in Tripod Dolphin Position by moving your hips. To prepare for Sirsasana (Headstand Position), endure here for approximately four breaths.
- Make sure the fingers are directed outward toward the face when you perform the Tripod Dolphin Position by moving the arms to conduct the palms on the ground. While the lower body balances on its toes, the elbows stay collateral to one another.
- Now, bend the right leg in Catur Svanasana Sirsasana Eka Janu Kurpara (Tripod Headstand Prepare One Knee On Elbow) and inspire and lift the right leg, slowly laying the right knee over the right upper arm. For around two breaths, keep balanced while breathing.
- The right knee should be inspired and then performed to rest on the right upper arm in Catur Svanasana Sirsasana Janu Kurpara (Tripod Headstand Prepare Knees On Elbow). Adjust your hips and knees to get a comfortable balance on your head, hands, shoulders, and elbows. Then, stay for around two breaths.
- One should issue and rest fully in Adho Mukha Virasana (Downward-Facing Hero Position) if they are not comfortable delving further into the exercise. Unwind here and return to the detailed instructions from steps two through six.
- Let’s go back to step 6. While keeping the left leg resting on the elbow, progressively raise the right leg by inspiring it. Headstand Tripod One leg should be half-lifted and one knee should be on the elbow (Catur Svanasana Sirsasana Eka Janu Kurpara Eka Pada Ardha Urdhva). Utilizing the strength of your core muscles to support your first lift and second to assist you maintain balance, and balance your entire body. For roughly two breaths, keep going behind her.
- In Catur Svanasana Sirsasana Eka Janu Kurpara Eka Pada Ardha Urdhva (Tripod Headstand Prep One Leg Half Raised), raise the right leg and extend it completely. For two breaths, stay back here and concentrate on your breathing while maintaining your balance with your core muscles.
- In the Tripod Headstand Sequence Flow, encourage the second leg to reach its maximum length. To keep the body balanced, fully extend the legs upwards while utilizing all of the core muscles, shoulder strength, and head strength.
- Hold on here for around two breaths, focusing on your body’s balance and breathing pattern. Once at ease, carefully rotate the right palm such that the fingers are facing the opposite direction.
- Once the right palm has been completed, guide the left hand’s fingers to point in the opposite direction. With the torso pointing inward, the fingers on both hands are now sharp.
- It is important to move the hands carefully here so that the head and neck are not restrained. To begin, you could do this against the wall or even support the head with a nice, thick blanket.
- Slowly adjust your body without impacting your head, then reach Sirsasana (Headstand Position) iii. Hold on for at least two breaths. Spend some time identifying the control factor and the breath flow.
- Delivering begins by bending the right leg and putting the toes on the floor. Next, set the toes on the ground and conduct the left leg while supporting yourself with the arms.
- To relax the undistinguished muscles throughout the neck and shoulders, take a moment to rest and transition into the postures of Savasana (Corpse Position) and Sarvangasana (Shoulderstand Position). To help recover the various overstretched muscles after the Sirsasana (Headstand pose) exercise, this pose must be practiced iii.
- One can follow the instructions below to enter Sirsasana (Headstand Position) iii and move on to another set of yoga positions if Method 1 feels too strenuous. Whatever approach one chooses, mastering the basis or foundation yoga position Sirsasana (Headstand Position) is crucial.
Method 2:
- The Different Step-by-Step Instructions for Headstand Pose (Sirsasana) iii
- Hold this posture for approximately six breaths.
- After letting go, assume the downward-facing dog pose, Adho Mukha Svanasana, and hold it for six breaths.
- By putting your knees on the floor and twisting your arms so that your palms are on the floor and your fingers are directed inward toward your feet, you may inspire and lower your body while stabilizing it in the Swan Position.
- Your stomach should rest on the back of your elbows as you balance on your toes and lean your weight on them. Hold still for around two breaths. While working the legs to fold at the knee, release and come to fold the head and shoulders downward.
- Place the top of the head on the ground in front of you, a few meters away from the palms. There is only one option: to place the top of the head on the ground and move the lower body as much as is comfortable.
- To aid notice and rest the movement and the tightness around the neck and shoulders, take a few rounds of breaths after the top of the head is on the ground.
- Walk the feet straight up to the hands and chest while raising the hips. Observe the pressure at the top of the head and take it slowly, one foot at a time.
- Again, if it is comfortable, stay here with the feet closer to the hands and the hips raised. Hold on for two breaths.
- Fold the right foot at the knee as you inhale and slowly raise it off the ground. Travel and relax. Lift your left foot off the ground and completely stretch both legs into the Headstand Position (Sirsasana) iii as you take a breath.
- Make sure you understand how the weight of the body affects the wrists since it can be challenging to operate the legs up here if there is insufficient wrist strength. When elevating the legs, there will even be a lot of pressure on the top of the head. So, before attempting to fully enter Sirsasana (Headstand Position), take it slow and easy and first enjoy the body’s mobility iii.
- Once comfortable, raise your legs and support yourself with your core muscles to maintain the position. Start with two or three deep breaths, then extend the duration. Use a big blanket and the wall to enjoy the flow.
- Release slowly by lowering one leg, then letting the other relax in the postures of Sarvangasana (Shoulderstand Position) and Savasana (Corpse Position).
Niralamba Sirsasana
What is Niralamba Sirsasana?
One variation of the traditional Headstand Position is the Unsupported Headstand, also known as Niralamba Sirsasana. Because you will be attempting to balance your entire body weight on your head inverted, it is much more difficult to accomplish than its basic asana. You don’t use your arms to support the weight; you simply use them to provide balance awareness.
The Niralamba Sirsasana technique is represented by the four Sanskrit terms. Lamba signifies “support,” while Nira implies “without.” While asana means “position” or “posture,” sirsa means “head.” Niralamba Sirsasana means “Unsupported Headstand” in English.
There are numerous versions of Niralamba Sirsasana depending on how you arrange your arms about your body. You can keep them on your sides at times, and on the floor on the front side of your body at other times. In essence, your head and neck muscles bear the weight of your body. Once more, the purpose of your arms is to achieve balance in the inverted position.
How to Perform Niralamba Sirsasana?
- The supported headstand, also known as Salamba Sirsasana, should be mastered before attempting Niralamba Sirsasana. Except for moving the hands to a position where the body weight rests on the head, the steps to accomplish this pose are the same as those for Salamba Sirsasana. This change requires careful consideration. One method is to gradually move the hands to the front of the body on the ground, which aids with balance even if it does not support any weight. The hands can even be raised from the floor and placed adjacent to the legs or thighs by advanced supporters. It took a lot of talent and balance to do this. In the early stages, a wall’s support can also be eliminated. To prevent falls, have a companion keep an eye on you as well.
- In the beginning, merely hold the last position for a few seconds. It can be raised according to one’s aptitude and ability.
- Return the hands to the floor and place them next to the head, just like in Salamba Sirsasana. Now, the hands help balance the body’s forward slant and support a portion of the body weight. Slope carefully back to the beginning position of Marjariasana. To assist in rerouting the flow of blood from the head to the body, one might voluntarily perform Tadasana. Take a few minutes to unwind by reclining in Shavasana.
What are the Precautions and Contraindications for the Headstand Pose?
Precautions:
- Learn this pose below a trainer’s level of expertise. Exercise independently only after receiving permission from your trainer.
- Take it slow and get some exercise. Maintaining this position takes time.
- For strength, keep in mind that you accomplish it near a wall, particularly if you are a beginner or have just started.
- Be mindful of your neck’s deployment at all times.
- Don’t do this throughout the menstrual cycle.
- The entire weight of your body is supported by the muscles in your hands, neck, and shoulders. Before beginning this pose, please see your yoga instructor if you have spondylitis.
- People who have high blood pressure, vertigo, or cardiac problems should also exercise caution.
- Additionally, when performing yoga poses, keep your breath steady.
Contraindications:
- Hypertension
- Cardiovascular issues
- Neck issues
- Shoulder issues
- Arthritis
- Osteoporosis
- Brain injuries
- Lower-back and spinal issues (e.g. Sciatica, herniated disc, SI-joint instability, and persistent discomfort)
- Acute migraine or headache
- For people with asthma or other respiratory conditions: only use items for brief periods and avoid them completely if they cause excessive pain, nausea, or dyspnea.
- Practitioners under the age of seven should avoid placing weight on the skull because it is still immobile and somewhat fragile.
What are the Common Mistakes in Headstand Pose?
- Avoid the common backing errors made when performing the headstand.
- You can put your hips behind your shoulders. Alternatively, your strength causes your elbows to stand far apart.
- The head may land in the incorrect position, which is either too far to the forehead or too far to the back.
- Do not perform this pose on a hard surface.
- either breathing too slowly or too quickly.
FAQs
What are the benefits of headstand pose?
What are Headstand’s (Sirsasana) main advantages? Numerous advantages of headstand (Sirsasana) include increased blood flow to the brain, sharper attention and mental clarity, strengthened upper body and core, decreased stress, and increased vitality. Additionally, it encourages improved balance and posture.
What is a headstand in yoga?
Put your head’s crown down on the ground. Your head should be lowered at the top, neither too much forward nor back. The bases of your thumbs will hold the back of your cranium in place of your hands. Straighten your legs and lift your hips, much like in Downward-Facing Dog.
Does a headstand reduce belly fat?
Headstand, also known as Shirshasana, is arguably one of the best yoga poses for losing weight. The drawback is that mastering it will require some practice. It is regarded as weight-loss power yoga. By toning your abdominal organs and improving digestion, the headstand pose helps you lose belly fat.
Why headstand is called King of Asanas?
The Headstand is the first of the 12 āsanas and is renowned as the “King of the Āsanas” due to its many benefits. It is great for enhancing memory, focusing attention, and turning libido into a potent life force.
Who should not do sirsasana?
Strengths and Weaknesses of the Body: Headstand Pose is not possible for people who have vertigo, a migraine, a severe headache, or any other medical condition. Since their skulls are not entirely fused or sufficiently hardened, children under the age of seven should not be allowed to do this stance.
References:
- Sirsasana Yoga (Headstand Pose) | Yoga Sequences, Benefits, Variations, and Sanskrit Pronunciation | Tummee.com. (2017, October 15). Tummee.com. https://www.tummee.com/yoga-poses/headstand-pose
- Ryt, A. P. (2021, December 9). How to Do a Headstand (Sirsasana) in Yoga. Verywell Fit. https://www.verywellfit.com/how-to-do-a-headstand-3567150
- Sorathiya, D. (2024c, October 13). Sirsasana Yoga Pose: Health Benefits, How to do? – Mobile Physio clinic. Mobile Physiotherapy Clinic. https://mobilephysiotherapyclinic.in/sirsasana-yoga-pose/
- EkhartYoga. (2021c, August 4). How to do a Headstand (Sirsasana) – Ekhart Yoga. Ekhart Yoga. https://www.ekhartyoga.com/resources/yoga-poses/headstand
- Team, T. A. (2024, January 3). Health Benefits Of Shirshasana. https://www.tataaig.com/knowledge-center/health-insurance/health-benefits-of-shirshasana


